 |
STEP
1
PREVIEW

DESCRIPTION
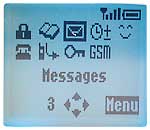
Enter <Menu> to begin you
e-mail configuration.
|
STEP
2
PREVIEW
DESCRIPTION
Enter <Messages>.
|
STEP
3
PREVIEW

DESCRIPTION
Select <E-Mail> in this menu.
|
STEP
4
PREVIEW
DESCRIPTION
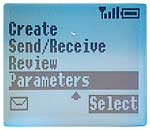
Scroll down and enter <Parameters>.
|
STEP
5
PREVIEW
DESCRIPTION
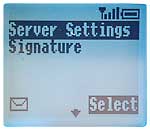
Select <Server Settings> to configure your email.
|
STEP
6
PREVIEW
DESCRIPTION
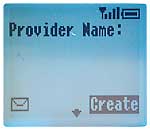
"Provider Name": select <Create> at the bottom of your
display.
|
STEP
7
PREVIEW
DESCRIPTION
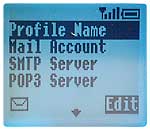
Select <Profil Name>...
|
STEP
8
PREVIEW

DESCRIPTION
...and enter a name e.g.: VISUAL ONLINE. Press <Ok> to save.
|
STEP
9
PREVIEW
DESCRIPTION
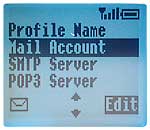
Select <Mail Account> and enter your email account name.
|
STEP
10
PREVIEW
DESCRIPTION
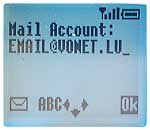
e.g.: email@vonet.lu
Press
<Ok> to save.
|
STEP
11
PREVIEW
DESCRIPTION
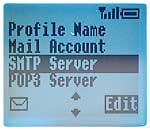
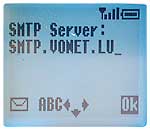
Select <SMTP Server> and enter your outgoing mail server.
|
STEP
12
PREVIEW
DESCRIPTION
e.g.: smtp.vonet.lu
Press
<Ok> to save.
|
STEP
13
PREVIEW
DESCRIPTION
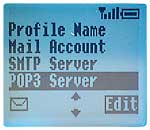
Select <POP3 Server> and enter your incoming mail server.
|
STEP
14
PREVIEW
DESCRIPTION
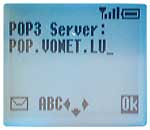
e.g.: pop.vonet.lu
Press
<Ok> to save.
|
STEP
15
PREVIEW
DESCRIPTION
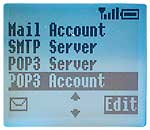
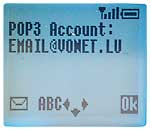
Select <POP3 Account> and enter the username of your mailbox.
|
STEP
16
PREVIEW
DESCRIPTION
e.g.: email@vonet.lu
Press
<Ok> to save.
|
STEP
17
PREVIEW
DESCRIPTION
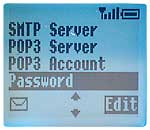
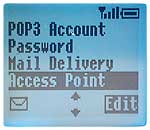
Select <Password>.
|
STEP
18
PREVIEW
DESCRIPTION
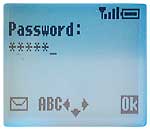
Enter
your personal password.
Press <OK> to confirm.
|
STEP
19
PREVIEW
DESCRIPTION
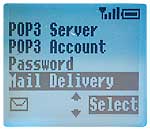
Enter <Mail Delivery>.
|
STEP
20
PREVIEW

DESCRIPTION
Select "Leave Messages" when received.
Press <Ok> to go on.
|
STEP
21
PREVIEW
DESCRIPTION
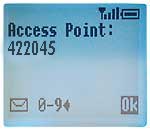
Select <Access Point> and enter your Internet Service Provider's
dial-in number.
|
STEP
22
PREVIEW
DESCRIPTION
e.g.: 422045.
Press <Ok> to save.
|
STEP
23
PREVIEW
DESCRIPTION
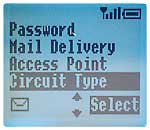
Select <Circuit Type>.
|
STEP
24
PREVIEW

DESCRIPTION
It is important to select "Digital". Press
<Ok> to continue.
|
STEP
25
PREVIEW
DESCRIPTION
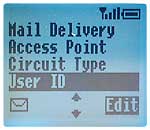
Select "USER ID" and enter your ID.
|
STEP
26
PREVIEW

DESCRIPTION
e.g.: internet.
Press <Ok> to save.
|
STEP
27
PREVIEW
DESCRIPTION
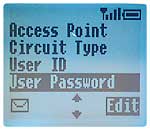
Select <User Password>.
|
STEP
28
PREVIEW
DESCRIPTION
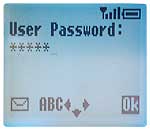
Enter
your password and
confirm with <Ok>.
|
STEP
29
PREVIEW
DESCRIPTION
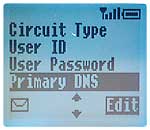
Select <Primary DNS>.
|
STEP
30
PREVIEW
DESCRIPTION
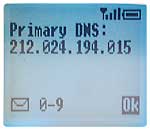
Enter 212.024.194.015.
Press
<Ok> to save.
|
STEP
31
PREVIEW
DESCRIPTION
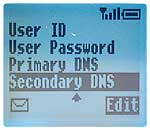
Select <Secondary DNS>.
|
STEP
32
PREVIEW
DESCRIPTION
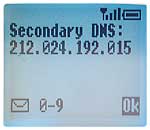
Enter 212.024.192.015.
Press
<Ok> to save.
|