 |
STEP
1
PREVIEW
DESCRIPTION
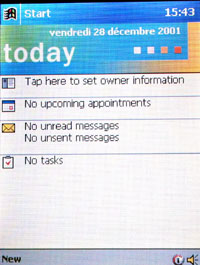
Select the <today> screen to start the configuration.
|
STEP
2
PREVIEW
DESCRIPTION
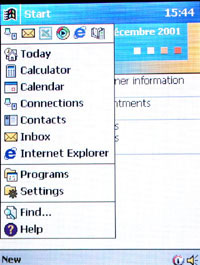
Press the windows logo and select <Connections>.
|
STEP
3
PREVIEW
DESCRIPTION
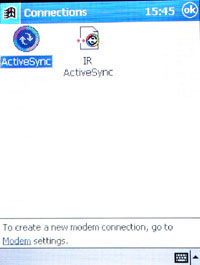
At the very bottom of this screen, press the <Modem> Link.
|
STEP
4
PREVIEW

DESCRIPTION
Select <New Connection...>
|
STEP
5
PREVIEW
DESCRIPTION
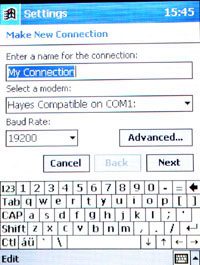
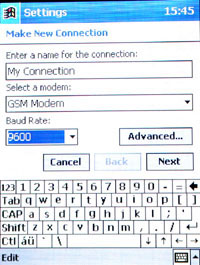
Enter a name for the connection: e.g. "My connection".
|
STEP
6
PREVIEW
DESCRIPTION
Select "GSM Modem" and set the baud rate to "9600".
"GPRS" is not possible.
|
STEP
7
PREVIEW
DESCRIPTION
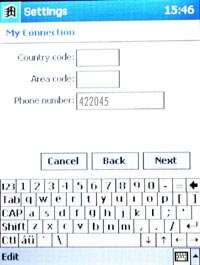
Leave "Country and area code" blank and enter the phone number
"422045". Press <Next> to go on.
|
STEP
8
PREVIEW
DESCRIPTION
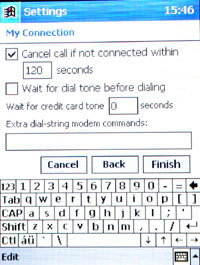
Enable "Cancel call if ...". Disable "Wait for dial tone
...". Leave the "Extra dial-string.." cell blank.
Select <Finish>.
|
STEP
9
PREVIEW

DESCRIPTION
Press <OK> in the top right corner of the screen to return to the
<Connections> menu.
|
STEP
10
PREVIEW
DESCRIPTION
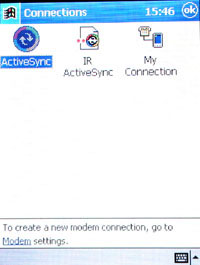
You can see the dial-up connection that you just created.
|
STEP
11
PREVIEW
DESCRIPTION
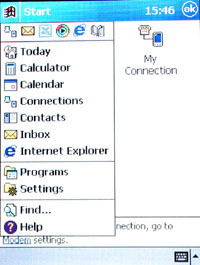
Press the Windows logo, and select <Inbox>.
|
STEP
12
PREVIEW
DESCRIPTION
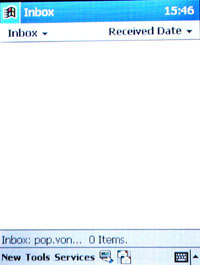
Select <Newservice> in the submenu of <Services>. |
STEP
13
PREVIEW
DESCRIPTION
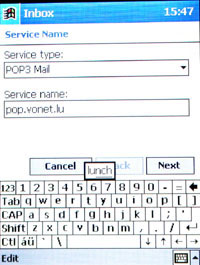
Select POP3 MAIL as "Service type". Enter your
incoming mail server e.g.:
pop.vonet.lu as "Service name". Press <Next> to continue.
|
STEP
14
PREVIEW
DESCRIPTION
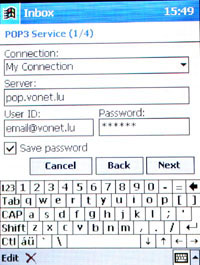
Connection: select the internet connection you just created.
Server: your incoming mail server.
User ID: your user id, e.g.: email@vo.lu. Enter your password and enable
"Save password". Press <Next>.
|
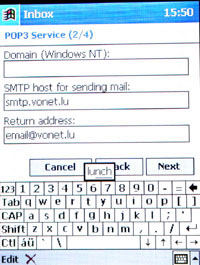
STEP
15
PREVIEW
DESCRIPTION
Leave the "Domain" cell blank.
SMTP host: your outgoing mail server e.g.: smtp.vonet.lu
Return adress: your email address,
e.g.: email@vonet.lu. Press <Next>.
|
STEP
16
PREVIEW
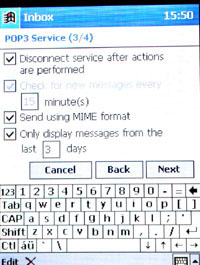
DESCRIPTION
Leave these settings at their default values and press <Next> to
go on.
|
STEP
17
PREVIEW
DESCRIPTION
Select "Get message headers only" and enable "include 100
lines". Press <Finish>.
|
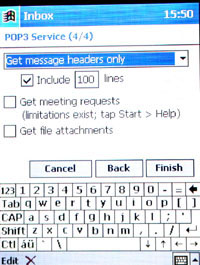
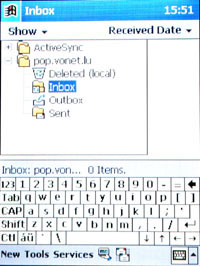
STEP
18
PREVIEW
DESCRIPTION
After a correct installation, your new service will be listed: e.g.:pop.vonet.lu.
Press <ok> to continue.
|
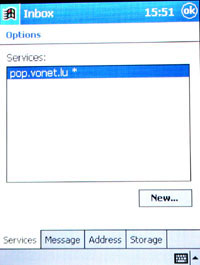
STEP
19
PREVIEW
DESCRIPTION
Enter <inbox>. Now you are able to send and receive mails.
|